
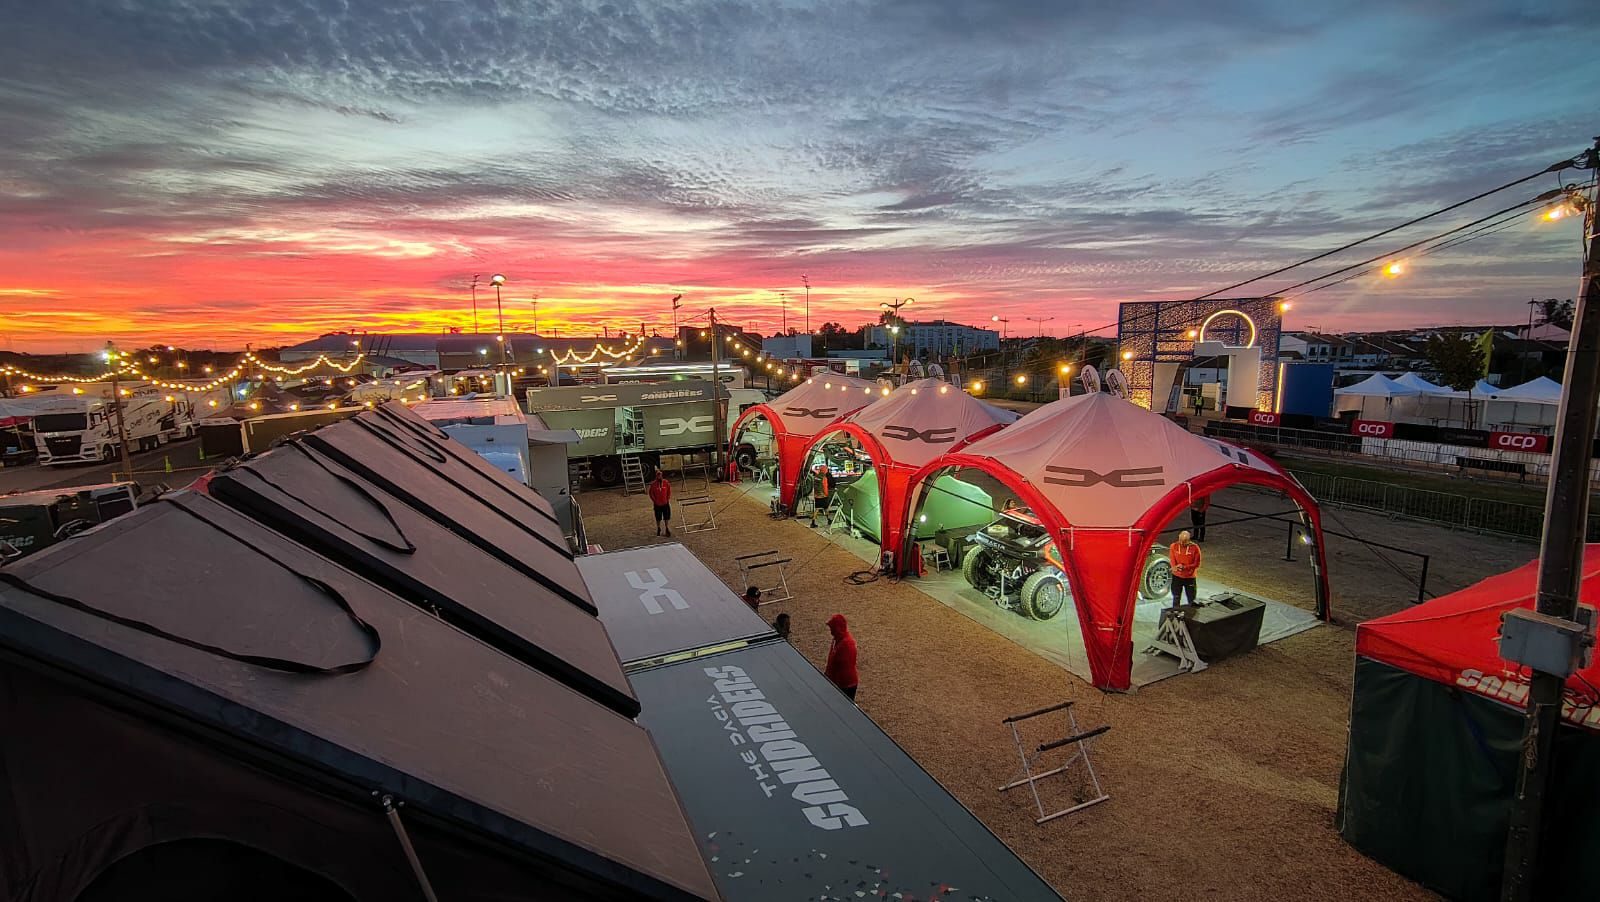
The event opens at 10 a.m.
The crew arrives at 8. Equipment needs unloading, branding needs positioning, products need arranging and the activation space needs to become operational.
Somewhere inside that schedule, the event structure needs to appear.
For production teams, the important question is therefore not only:
“What does the tent look like?”
It is also:
“What does it take to move it from its transport packaging to an event-ready structure?”
A sealed pneumatic structure removes the need to assemble a conventional rigid supporting frame.
That does not mean every inflatable structure has the same setup time or crew requirement.
Size, configuration, anchoring, surface conditions and crew experience all matter.
How Is a Sealed Pneumatic Event Tent Set Up?
The principle differs from a traditional frame structure.
Air chambers form the supporting structure. They are pressurised and then sealed.
AXION distinguishes between:
- a constant-air system, where a blower supplies air continuously,
- a sealed pneumatic system, which is inflated and sealed and remains pressurised without continuous electrical power.
With a sealed system, the blower or pump is therefore used for inflation rather than continuous operation throughout the event.
How Long Does Setup Take?
Between 5 and 15 minutes for most products.
Setup time depends on:
- structure size,
- configuration,
- number of components,
- side walls and accessories,
- anchoring method,
- surface type,
- access to power during inflation,
- crew experience,
- site conditions.
A compact structure and a large custom event space should not be expected to have identical setup times.
How Many People Are Required?
Most AXION products can be set up by a crew of 1 to 3 people, although crew requirements also depend on the specific product.
The complete process includes:
unloading → unpacking → positioning → inflation → securing → accessories → inspection.
Larger structures may require additional people simply for safe handling before and during inflation.
Without model-specific data, it would therefore be misleading to claim that every AXION inflatable structure can be installed by one person.
What Should Be Prepared Before Inflation?
Fast setup begins before the pump is switched on.
1. Check the Allocated Area
Allow sufficient space for the structure, anchoring and safe handling.
2. Inspect the Surface
Remove sharp objects, broken glass, metal and other debris that could damage the structure.
3. Prepare the Correct Anchoring System
AXION uses different approaches according to the surface:
| Surface | Securing Method Described by AXION |
|---|---|
| Grass / soil | Steel stakes + guy ropes |
| Gravel / rocky ground | Longer heavy-duty stakes |
| Concrete / asphalt | Ballast bags, weights or mobile anchoring points |
| Snow / ice | Snow anchors or weights |
Arriving on asphalt with equipment designed only for soft ground can turn a quick installation into a logistics problem before setup has even started.
4. Prepare Power for Inflation
A sealed pneumatic system does not require continuous power during the event, but suitable equipment is required to inflate it.
The exact blower or pump requirements depend on the product.
5. Position the Structure Correctly
Before inflation, check that the structure is not:
- twisted,
- caught on an object,
- incorrectly positioned,
- in contact with sharp edges.
A few additional minutes spent preparing the structure can prevent a much longer interruption later.
6. Inflate the Pneumatic System
With a sealed pneumatic system, the chambers are pressurised and then closed.
The structure subsequently remains pressurised without requiring a continuously operating blower.
Before proceeding, verify that:
- the structure has reached its intended shape,
- relevant chambers are functioning,
- valves are closed,
- there are no visible signs of a problem.
7. Secure the Structure
Inflated does not mean event-ready.
For outdoor use, correct securing is an essential part of installation.
AXION states certified wind resistance up to 60 km/h (37 mph) when properly anchored (tested up to 100 km/h / 62 mph), with the exact limit depending on the model.
The crucial phrase is:
when properly anchored.
Anchoring time should therefore be included in realistic setup estimates.
8. Add Side Walls, Branding and Accessories
Inflating the supporting structure may not complete the installation.
Depending on the configuration, additional work can include:
- side walls,
- branding elements,
- lighting,
- banners,
- furniture,
- product displays,
- other event equipment.
Production schedules should therefore distinguish between:
structure setup time
and
complete activation setup time.
They are not the same metric.
What Commonly Slows Setup Down?
Often, it is not the structure itself.
Unknown Surface Conditions
The crew arrives with inappropriate anchoring equipment.
No Available Power Source
You brought the blower. The socket did not receive the invitation.
An Unprepared Installation Area
Other equipment needs to be moved before work can begin.
An Inexperienced Crew
The first installation will naturally differ from the twentieth.
Missing Components
Poorly organised accessories create unnecessary searching.
No Time Buffer
Outdoor conditions can affect even a well-planned schedule.
Why Does Setup Time Matter for a Roadshow?
Imagine a twenty-event programme.
A 30-minute difference per setup becomes:
30 minutes × 20 installations = 10 hours of labour.
And there are still twenty dismantling operations.
For touring activations, infrastructure decisions can therefore affect:
- labour costs,
- setup time,
- dismantling time,
- logistics,
- scheduling between locations.
A technical detail becomes an operational cost.
Setup Time vs. Total Production Cost
Consider two hypothetical solutions.
Solution A has a lower purchase price but requires a larger crew and longer installation.
Solution B costs more initially but requires less production time at every stop.
Without actual figures, neither can automatically be called more economical.
For recurring events, however, it is useful to calculate:
crew cost × installation time × number of events.
Purchase price is only the first line of the spreadsheet.
How Can Repeated Setup Become More Efficient?
Standardisation helps.
Create a Setup Checklist
Give every crew the same process.
Label Components
Less guessing means less wasted time.
Prepare Anchoring for Each Venue
Confirm the surface before travelling.
Check Equipment Before Departure
Not in the venue car park.
Record Problems After Each Event
Resolve them before the next stop.
After several installations, the crew should no longer be figuring out how to “build the tent.”
They should be executing a routine.
Dismantling: The Event Does Not End When the Air Comes Out
The reverse process matters too.
A proper dismantling procedure includes:
- removing equipment and accessories,
- releasing the structure according to the appropriate procedure,
- deflating it,
- inspecting its condition,
- removing contamination,
- ensuring it is dry before longer-term storage,
- packing it correctly for transport.
Measuring only the time required to deflate the structure does not provide a realistic picture of total logistics.
Frequently Asked Questions
How long does it take to set up an inflatable event tent?
Between 5 and 15 minutes for most AXION products. The exact time depends on the model, dimensions, configuration, surface, anchoring method and crew experience.
How many people are needed?
Most AXION products can be set up by 1 to 3 people. Crew requirements depend on the product and dimensions, and larger structures also require consideration of safe handling during positioning, inflation and securing.
Does a sealed pneumatic tent need a blower running throughout the event?
No. The sealed pneumatic system remains pressurised after inflation without a continuously operating blower.
Do I need electricity?
Inflation requires appropriate pressurising equipment. Exact electrical requirements depend on the equipment and model.
Is anchoring part of setup time?
Yes. An outdoor structure should not be considered event-ready until it has been appropriately secured.
Is an inflatable tent suitable for roadshows?
A sealed pneumatic solution can be suitable for repeated events because it does not require assembly of a conventional rigid supporting frame. Actual efficiency should be assessed using the specific product, transport requirements and crew.
What should be checked before opening?
Inspect the structure, valves, anchoring, stability, entrances, accessories and site conditions.
Setup Checklist
- ✓ Confirm model and configuration
- ✓ Check available space
- ✓ Identify surface type
- ✓ Remove sharp objects
- ✓ Prepare appropriate anchoring
- ✓ Arrange power for inflation
- ✓ Check blower/pump
- ✓ Position the structure correctly
- ✓ Inflate and inspect chambers
- ✓ Close valves
- ✓ Secure the structure
- ✓ Install walls and accessories
- ✓ Complete final inspection
Conclusion
The question “How quickly can we set up an inflatable tent?” becomes useful only when a specific model and event conditions are known.
Sealed pneumatic technology eliminates the need to assemble a conventional rigid supporting frame and does not require a continuously operating blower after pressurisation.
Real setup time, however, includes more than inflation:
site preparation + positioning + inflation + anchoring + accessories + inspection.
For one event, these are minutes or hours in a production schedule.
Across a roadshow, they become labour, logistics and costs multiplied by the number of stops.
Planning a Roadshow or Recurring Event Programme?
Send AXION your number of events, venue types, required dimensions and configuration so that setup logistics can be considered alongside design.
Explore the AXION range of sealed inflatable event tents, including the SQUARE, CUBE, HEXA, SPIDER and POD.
Customers in the United States can contact ZEPELIN USA directly at sales@axion4event.com or +1 (239) 428 1027.


